


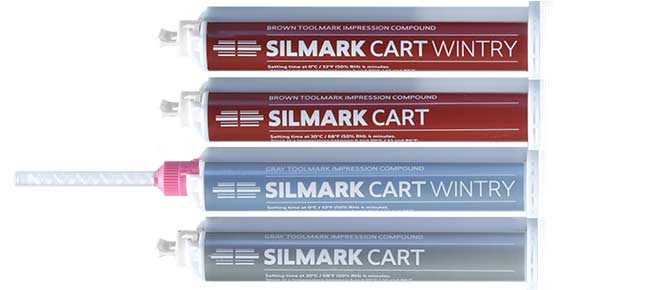

General
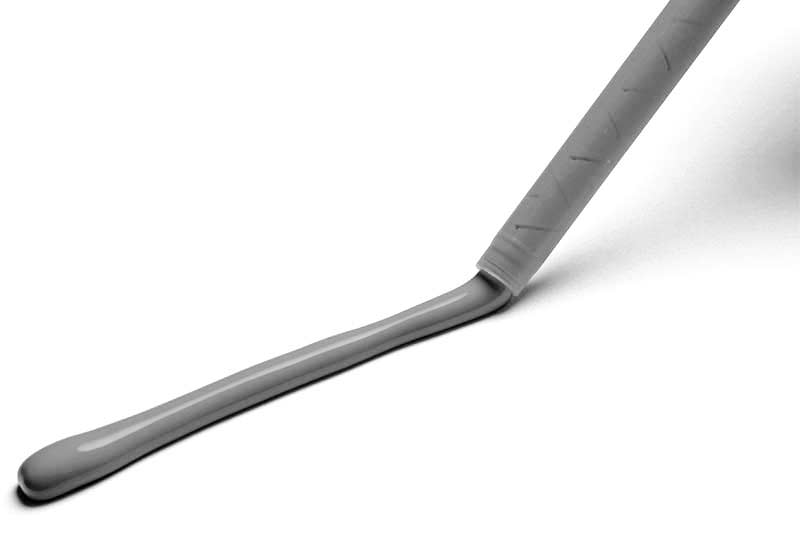
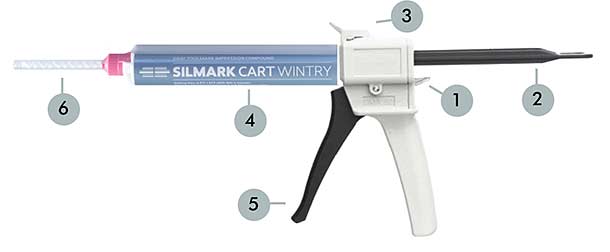
Silmark CART is a 2-part addition curing silicone (polyvinylsiloxane, platinum-catalyzed curing) casting compound in a cartridge. Base and hardener paste are contained in separate cylinders of the cartridge. The cartridge is mounted in the dispenser and a (new) mixing tip is attached to the front of the cartridge. By pulling the trigger of the dispenser equal amounts of base and hardener paste are pushed through the mixing tip (a static mixer) and a ready-to-use mixture can be dispensed directly out of the tip onto the toolmark.
Like the condensation curing Silmark in a tube, Silmark CART has a high pigment content. The high pigment level in the material ensures that even with strong lighting under a microscope light does not get into the material and is reflected by particles under the surface of the cast creating a fuzzy picture. Thus an optimally sharp image of the impression is obtained. The color gray has the advantage of giving an optimal contrast in photography and digital storage of the toolmarks.
Advantages of Silmark CART over the condensation curing Silmark are the userfriendliness, the larger elongation till tearing (so that it is easier to get a cast out of a narrow place) and the minimal shrinkage upon curing. Because the Silmark CART comes out the tip already mixed and is applied to the toolmark straight from the mixing tip the chance of skin contact and or contamination of clothing and the like is minimal.
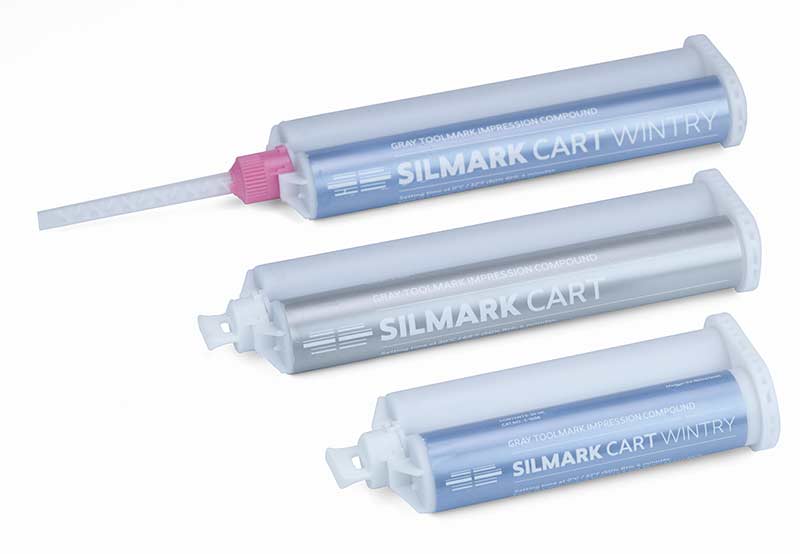
The ratio of base paste to hardener paste is fixed (1:1) so that adding some more hardener for working at lower temperature, as is done iwth the classic condensation curing Silmark, is impossible. For working at lower temperatures there is a special "Wintry" version that cures faster.
To be able to work with the dispenser in narrow spaces there are also 50 ml cartridges (instead of the 75 ml) available. The plunger for this cartridge in the (modern) dispenser is also shorter than the plunger in the classic model dispenser. With the modern dispenser and the plunger for 50 ml cartridges a 75 ml cartridge cannot be completely emptied. In the classic model dispenser with plunger for 75 ml cartridges both 50 ml and 75 ml cartridges can be used. The plungers for the two models are not interoperable.
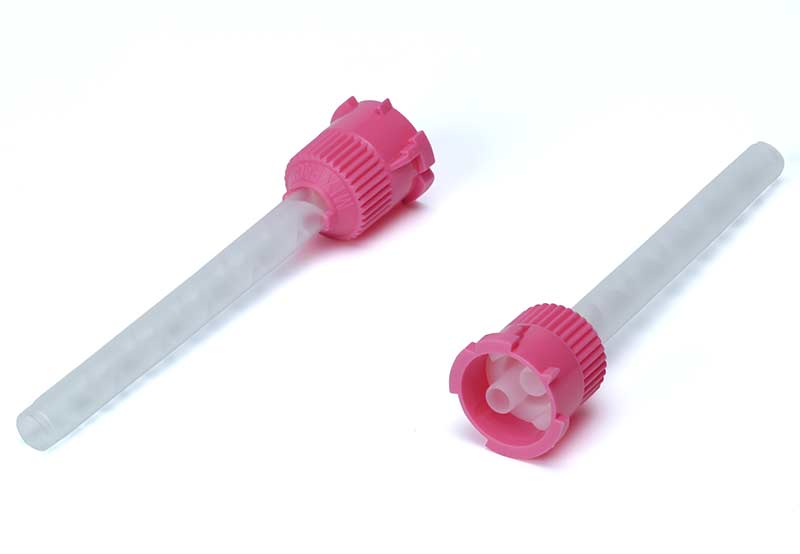
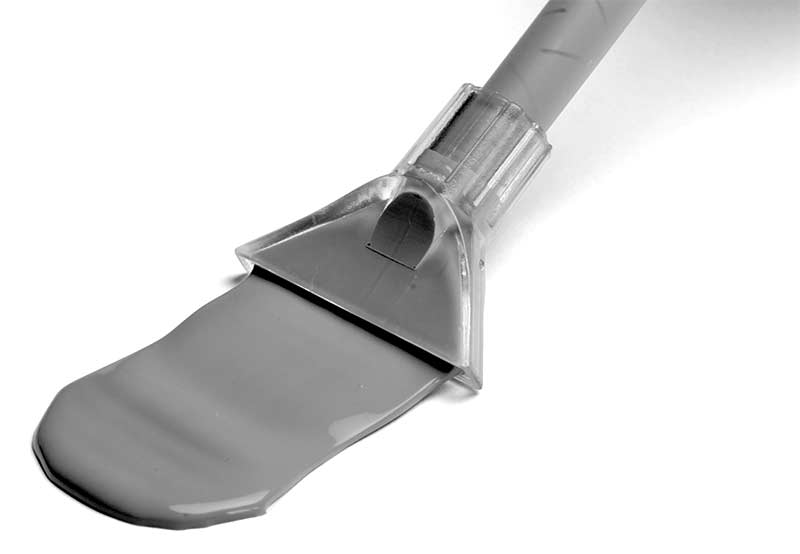
To apply the silicone paste over a wider area a special "spreader" tip is available. There are connected to the front part of the mixing tip.
After having applied the casting material to a toolmark the mixing tip is not removed. The cover cap that has been removed before the first use of the cartridge only fits in one way on teh cartridge. However, when you reuse it you run the risk of some hardener paste coming into contact with the base pase which might lead to parts that are cured which block the cartridge or mixing tip when using the cartridge the next time.
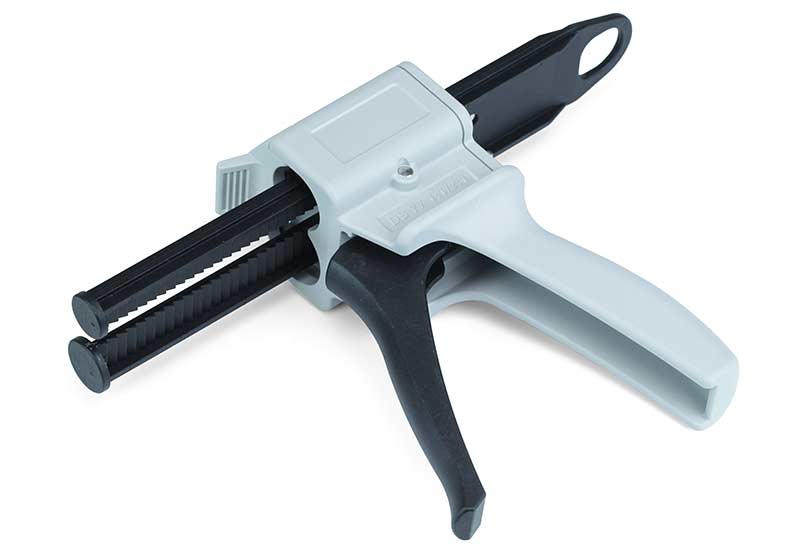
Preparing for first use (classic model)
- Push the metal lever (1) up and pull the plunger (2) all the way to the back.
- Pull up the locking flap (3) and insert the cartridge (4) in the guiding grooves downward into the dispenser (which side is left or right doesn't matter). Push down the locking flap and then push the plunger (2) forward till you feel resistance (or use the trigger.)
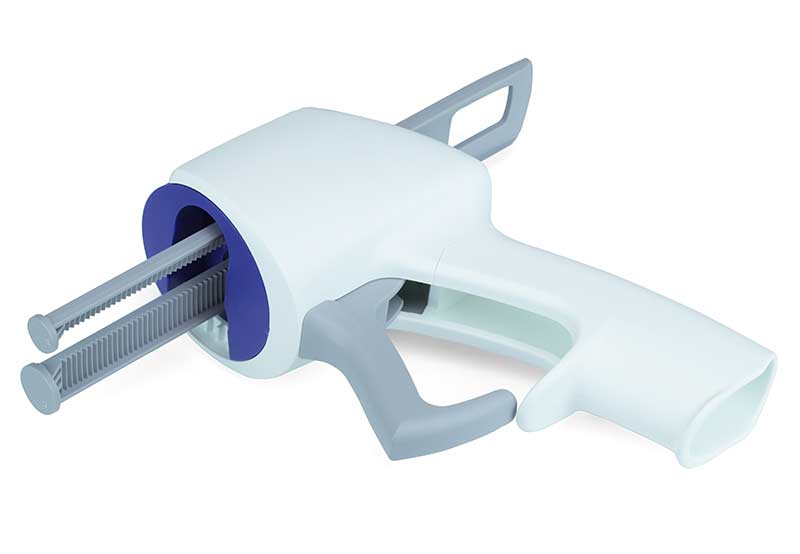
Preparing for first use (modern model)
- Push the gray plastic level on the back of grip up and pull the plunger all the way to the back.
- Turn the blue ring on the front counter-clockwise (seen from behind) so that the opening is pointed upwards. Insert the cartridge in the guiding grooves downward into the dispenser (which side is up or down does not matter). Now turn the blue ring holding the cartridge 90 degrees (clockwise seen from the back) so that both cylinders line up with the plunger. Now push the plunger forward or use the trigger untill you feel resistance.
Attaching a mixing tip and making a cast
- Remove the cover cap of the cartridge (turn 90 degrees counter-clockwise seen from behind.)
- When using a cartridge for the very first time it is advisable to now hold a tissue close under the two openings in the front of the cartridge and pull the trigger carefully untill you see that paste is coming out of both cylinders. If there is only one side from which paste flows keep pressure on the trigger until paste also flows out of the other cylinder. Now wipe the openings clean and attach the mixing tip (6) (Luer lock style: turn 90 degrees clockwise).
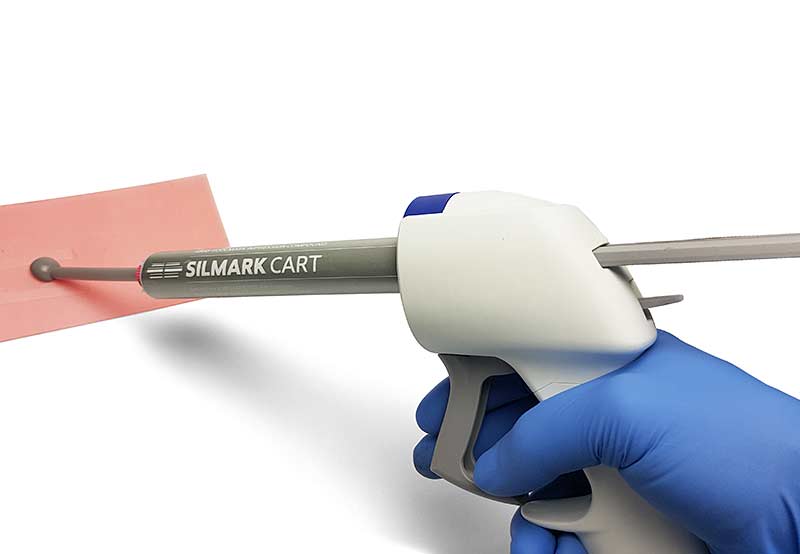
- By pulling on the trigger (a steady pressure is advised for the best mixing action) both pastes are pushed out of the cartridge through the mixing tip and simultaneously mixed. Even than the very first bit of casting material out of the tip might not be of the correct 1:1 composition. Apply it on a tissue before continuing applying the material to a toolmark.
- Apply the silicone compound with the mixing tip onto the toolmark. Keep the mixing tip while applying the casting compound to avoid inclusion of air bubbles while covering the area you want to cast.
- If you need to cast on several places continue casting if you have started. The mixed material will cure in the mixing tip so after a short time it cannot be extruded anymore and you will need to use a new mixing tip.
After you are finished applying the casting material leave the mixing tip on the cartridge. It is now perfectly closed until the next use of the cartridge.
Removing the cartridge (classic model)
Push up the metal lever on the back of the pistol grip (1) and pull the plunger all the way to the back. Now lift the locking flap (3) and lift the cartridge out of the dispenser. Push the locking flap back in place.
Removing the cartridge (modern model)
Push up the gray plastic lever on the back of the pistol grip and pull the plunger all the way to the back. Now turn the cartridge 90 degrees (counter-clockwise as seen from the back) so that the opening in the blue ring is facing up. Lift the cartridge from the dispenser.
Incompatible materials
There are materials that are known for poisoning the platinum catalyst in the hardener paste thereby blocking the curing process. Rubber, latex gloves and copper are know problem surfaces. So, better use nitrile gloves. On the surface the silicone doesn't cure resulting in a fluid surface of the cast and a fluid residue on the toolmark.
On these problem surfaces the classic condensation curing Silmark should be used.
Setting time
The setting time at 20 °C is about 5 minutes. With a 10 degrees Celcius difference the setting time changes a factor 2. At a 20 °C this is a factor 4!
The setting time of the Wintry versie at 5 °C is also about 5 minutes.
If the cast is taken up too soon after application and the curing is not yet sufficient you risk a irreversible deformation of the cast due to the force needed for removing the cast from the mark.
Storage and shelf life
The shelf life of Silmark CART depends on the reaction rate of the platinum compound catalyst with oxygen from the air into inactive compounds. Try to use Silmark CART within a year of purchase. Store the cartridges at a temperature between 5 and 30 °C (cooler is better).
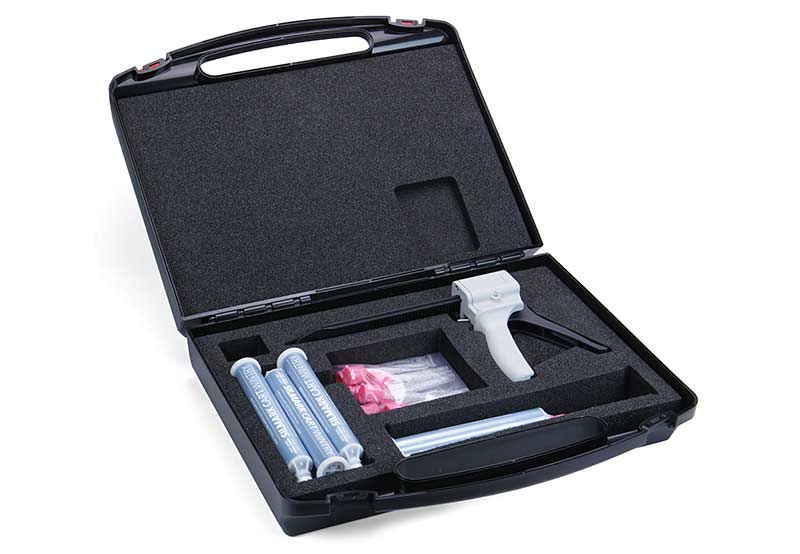
| C - 8200 | 1 | Dispenser (classic model) |
| C - 1105 | 2 | Silmark CART gray cartridge, 75 ml |
| C - 8310 | 1 | Mixing tips (pink), 10 pieces |
In the kit is room to store a number of spreader tips. These are not included in the kit though. |
||
Manual for Silmark CART in the Serbian language (Latin).
